- [email protected]
- +353 (0)86 224 0139
- Free Shipping Worldwide
Airbrushing for Beginners: How to Begin
This is a beginner's guide to airbrushing. It covers the fundamentals, as well as how to get started and what you should know before you begin airbrushing.
Reading time: 20 minutes
TL;DR
- Discover the foundations of airbrushing and gain valuable insights into essential tools and techniques.
- Learn three top tips specifically designed for beginners to overcome initial challenges and start creating impressive artwork.
- Unleash your creativity and embark on an artistic journey with the help of our expert guidance and step-by-step instructions.
Airbrushing for Beginners: 3 Top Tips How to Get Started
Are you a beginner itching to unleash your creativity through airbrushing? Look no further; we’ve got you covered! Airbrushing, with its ability to create stunning and seamless blends, can be intimidating for newcomers.
The good news is that we’re here to solve that problem and set you on the path to success. In this article, we will explore three top tips specifically tailored for beginners, helping you overcome any initial hurdles you may encounter.
From choosing the right equipment to understanding basic techniques, we will provide you with the knowledge and guidance needed to kickstart your airbrushing journey.
So grab your airbrush and get ready to dive into a world of endless artistic possibilities!
What is an Airbrush?
An airbrush is a small air operated tool, hand-held device that uses compressed air to spray paint or other fluid media.
The basic underlying concepts of how an airbrush works is that a stream of fast moving (compressed) air is passed through a venturi. This creates a local reduction in air pressure (suction) that allows paint to be pulled from an interconnected reservoir at normal atmospheric pressure.
The high velocity of the air atomizes the paint into very tiny droplets as it blows past a very fine paint-metering component.
The paint is carried onto paper or other surfaces and operator controls the amount of paint being blown by using a variable trigger. This manipulates the position of a very fine tapered needle that is the control element of the paint-metering component.
An extremely fine degree of atomization is what allows an artist to create such smooth blending effects when using an airbrush.
Airbrush History
Up until the mid 2000s, airbrushes had been widely published as having been invented in 1893. The first spray-painting device was patented in 1876 (Patent Number 182,389) by Francis Edgar Stanley of Newton, Massachusetts.
It functioned like a diffuser or atomiser and didn’t have continuous air supply. In addition to their Stanley Steamer, Stanley and his twin brother invented a method for continuously coating photographic plates (Stanley Dry Plate Company). As of yet, no artistic images have been seen or documented that used this ‘paint distributor / atomiser’.
The first compressed air tool developed was the “paint distributor” developed by Abner Peeler. Designed to paint using watercolours and other artistic mediums, this device used a hand-operated compressor to supply continuous air. The design was rather crude, relying on surplus parts from a jeweller’s workshop such as old screwdrivers and welding torches.
Liberty Walkup of Mount Morris, Illinois, developed a working prototype after 4 years of further development. He re-patented his revised design under the name ‘airbrush’, which he attributed to his wife Phoebe.
The name ‘Air Brush’ was formally adopted at a meeting of stakeholders of the new Air Brush Manufacturing Co. on 6 October 1883.
Prehistoric Spray Painting
Although the precise methods by which early artists created primitive art may have historically been lost, a new era in our knowledge was discovered in 1940, near the town of Montignac in South Western France, in the Lascaux cave.
Using a few flints, some blocks of pigment, grinding stones, bone, a few primitive brushes and swabs, and stencils cut from hides or human hand. This provides us with an insight into both prehistoric art and human origins.
This is the sum total of the materials and tools needed for the graphic work in the cave.
Ancient civilizations might have used primitive airbrush art to create primitive art, according to experts. Research suggests that this primitive form of airbrush art may have been achieved by blowing pigment through hollow bones, as opposed to applying paint straight from the brush.
Although this is a rather rudimentary method when compared with contemporary types of airbrushing, it does still achieve a finely grained distribution of pigment.
Research at the Niaux cave in Ariège has revealed that the pigments were generally mixed with talc to economise on the rarer colourants. In Lascaux, on the other hand, pigments were plentiful and needed no additives, except for the water that served as a binder.
In the Chauvet-Pont-d’Arc Cave, red dots or handprints were created by placing a palm filled with ocher on the wall. Many of the figures were achieved by blowing pigment onto the wall, a process we now know as aerography. The Palaeolithic artists likely prepared the pigment and spit it onto their hands.
Man Ray
The avant-garde artist Man Ray is credited with introducing the airbrush to the world of fine art. Man Ray was a major figure in the Dada and Surrealist movements and worked in a variety of mediums. He appreciated the ability of the airbrush to produce an industrial look with no brush strokes.
Man Ray produced a series of artworks called ‘Aerographs‘ from 1919 to 1921, using stencils made from household objects as well as hand-crafted stencils.
What Equipment Do I Need to Start Airbrushing?
An airbrush is, of course, a necessity to begin with, but it is not the only tool you will need. There are some elements that are absolutely necessary while others can be optional.
To help you get started, here is a list of equipment you will need:
Essential
- Airbrush;
- Air Source – Propellant Cans or Compressor;
- Air Hose;
- Paint.
Recommended/Optional
- Spray Booth;
- Turntable;
- Easel or Work-stand;
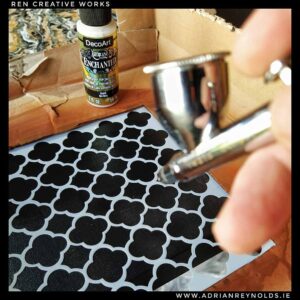
- Stencils for basic shapes & textures;
- Low Tact Masking tape various widths;
- Frisket / Masking Film;
- Sharp Knife;
- Spare Airbrush Needle;
- Latex Gloves;
- Pipette;
- Small Brushes;
- Cotton Buds;
- Airbrush Thinners.
- Airbrush Reducer.
How to Choose the Right Airbrush
It can be confusing figuring out the right airbrush to purchase. It all depends on your experience level, the type of projects you will be completing and the amount of money you want to spend.
Two questions you need to ask yourself are: What am I going to paint? What do you want to do with your airbrush?
Getting Started with Airbrushing Miniatures/Models
I loved making plastic model cars and aircraft when I was younger. At the time, I had a basic beginner’s airbrush to introduce the skill. However, it was frustrating to use because it would always seem to run out of propellant half-way through painting.
Ultimately, I opted for paint spray cans as a more reliable means of achieving the desired results. But what I really needed was a guide for airbrushing model cars for beginners.
Airbrushing miniatures or models is all part of a process, which can include elements of design, sculpting, parting, priming and painting. Depending on the material of your model, it is important to determine the type of paint (primer, base, and top coats) that you should apply. There is nothing as disheartening as a perfect paint job peeling off due to poor preparation or priming, and using the wrong type of paint.
There are a variety of airbrushes for models and miniatures on the market, each with different features and not all offer the same functions. For example, an illustrator would use an airbrush that can use ink and not paint.
As a result, you should purchase an airbrush that can handle enamel paint and acrylic paint. In addition, you may want to consider any weathering techniques you want to apply to your models, as this will really improve the look of your models.
Be fearless when experimenting with colors, as it’s like a high-tech art project that can make you much richer as an artist in your spare time. Although, it can be a little daunting for beginners, airbrushing miniatures or models can be a fun and rewarding hobby.
Airbrushing – Fine Art
An airbrush allows artists to apply paint to surfaces to create a variety of effects, from realistic to abstract.
From photorealism through to mastering the foundations of classical realism in the medium of choice. For example, a fine art technique that lends itself well to an airbrush, is representing your subject in varying shades of neutral grey.
Grisaille, ‘greyed’ (from the French word gris ‘grey’), paintings in a range of different shades of grey. This gives an artwork a sense of depth and neutrality. This technique is often used in large decorative schemes, imitating the look of sculpture and paintings feature contrasting zones of high and low detail.
Regardless of your medium, it certainly is an approach to experiment with. With this approach, you can focus on the lighting within your composition and subject.
Trying to create this with opaque colours is much more challenging. The same effect can always be achieved using transparent colour washes on top, as was done by the old Masters in the past.
Whereas, the definition of monochromatic painting, is an image displaying a single colour or different shades of a single colour. For example, paintings executed in shades of brown are referred to as ‘brunaille’, and paintings executed in shades of green are called ‘verdaille’.
Airbrushing for Beginners: Makeup
Airbrush makeup application is a relatively new trend in the beauty industry. Makeup is not applied with the usual tools such as foundation brushes or sponges. With the help of an airbrush gun this makes the application of fake tan or body contouring more hygienic for creating a flawless look. Until recently, only professional makeup artists used this technique.
However, airbrush makeup is becoming more and more popular at home. This is no coincidence: airbrush makeup has many advantages and with the right equipment it is ideal for home use.
Airbrushing for Beginners: Nail Art
With airbrush nail art, the nails are not painted with a brush but sprayed by using an airbrush gun. You can create anything you want, from French nails to neon pink nails, to detailed works of art. What matters most is the right airbrush equipment – and your skill.
A nail studio using airbrush technology for painting fingernails is unfortunately more of a rarity than the norm, even in our high-tech world. That’s why you might want to consider doing it yourself, because you can easily design great airbrush art too! All you need is the right airbrush equipment and a little practice.
Airbrushing – Cake Decoration
Cake decorating is a fun and creative way to express your creativity. Just like any special occasion, it is also a great way to show your love and affection for someone special. Cake decorating is not just about making beautiful cakes, it is a craft and an art.
There are many ways to decorate a cake, traditional cake decorating can be done with icing, buttercream, fondant, or sculpting with sugar paste. In recent years, airbrushing cakes has become increasingly popular, as it lets bakers add realistic details to their cakes.
There are many ways to go about doing this, and each person has their own style. For example, by using airbrush food coloring, you can create interesting designs that are fairly easy with stencils. However, if you’re confident and have the time, there’s nothing stopping you from creating a freehand edible masterpiece.
Airbrushing – Photography
These days, we talk a lot about digital photography, and the industry is booming because people love taking pictures. Did you know that airbrushes were once used to retouch skin, fix blemishes, colourise and edit photos for magazines and other forms of media.
However, in the early 1990s, the computer photo editing program Adobe Photoshop was released to the world. It was a revolutionary computer program, that on launch was only available for Apple Macintosh Computers.
Photoshop quickly became well-known among photographers and designers all over the world. So much so, in fact, that it has even become a widely used verb. One of the many tools contained in this program to this day, is the airbrush!
Custom Airbrushing
Painting custom designs is a great business idea to ensure that your customers have the right look for their products.
Designs can be painted on motorbikes, helmets, cars, sports equipment, musical instruments and even clothing items. For example airbrushed T-Shirts, baseball caps and trainers/sneakers are very popular.
No matter what you sell, keep in mind that you will need to find people who love what you have to offer. You need the right equipment and knowledge first, followed by a solid understanding of how to price your services and charge your clients accordingly.
The Different Types of Airbrushes
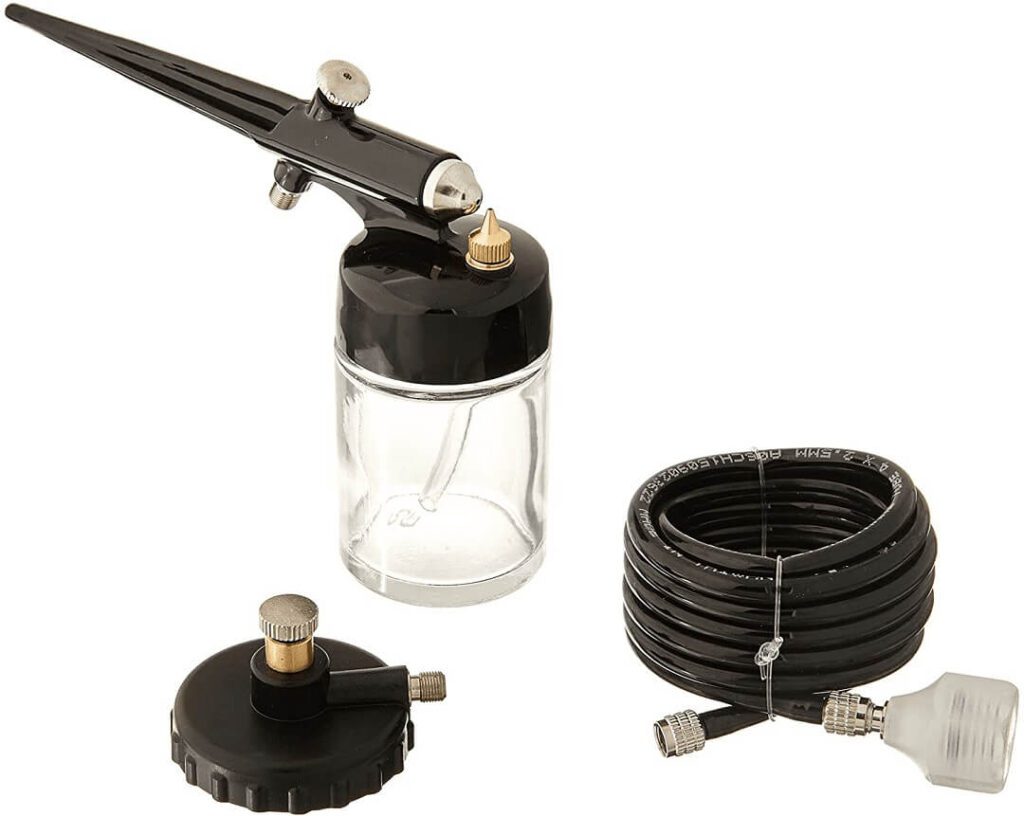
Airbrushes come in different shapes and sizes, with a variety of nozzle sizes and shapes. Several airbrushes are available that can help you tackle more than one task. Some allow you to switch out needle/nozzle sets to spray at different sizes, and gives you 2 in 1 spraying characteristics.
Single v Double Action Airbrush
When you’re looking to buy an airbrush, it helps to understand the difference between a single action and double action airbrush.
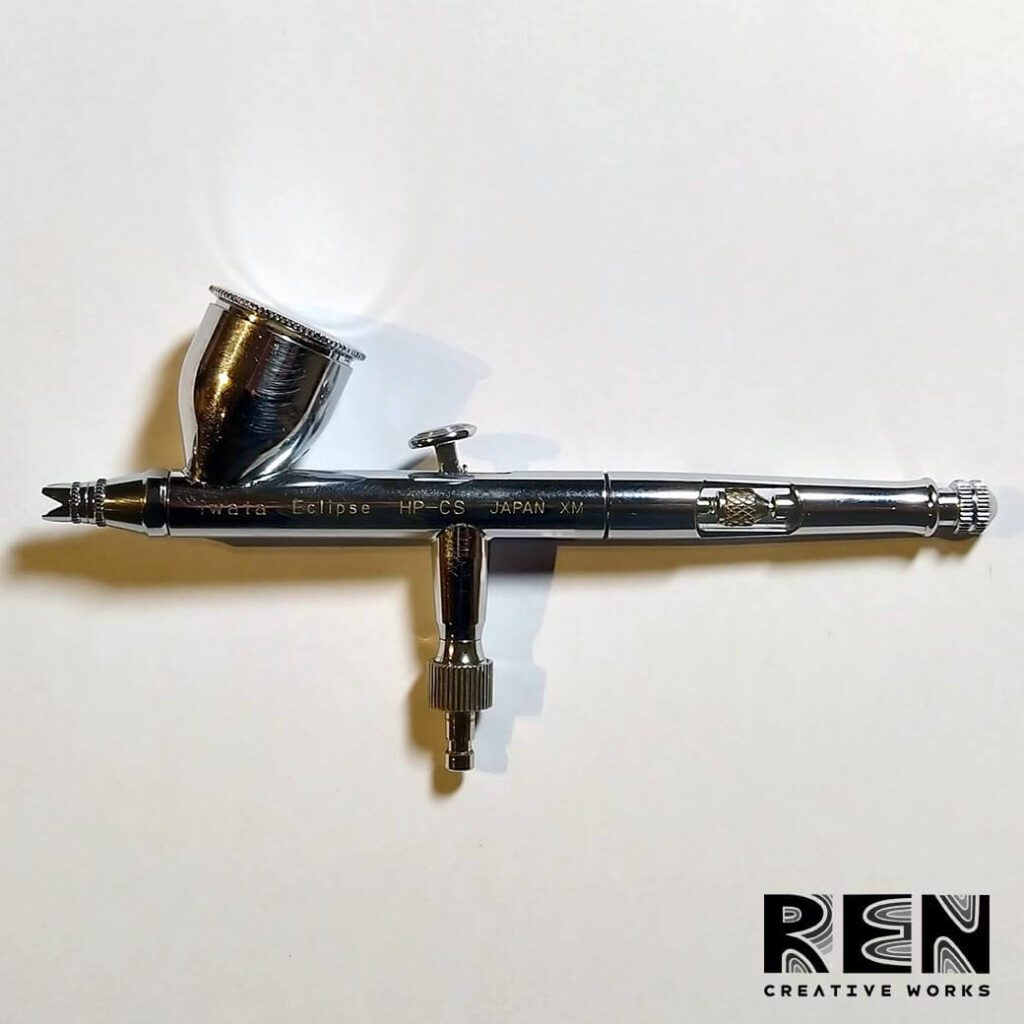
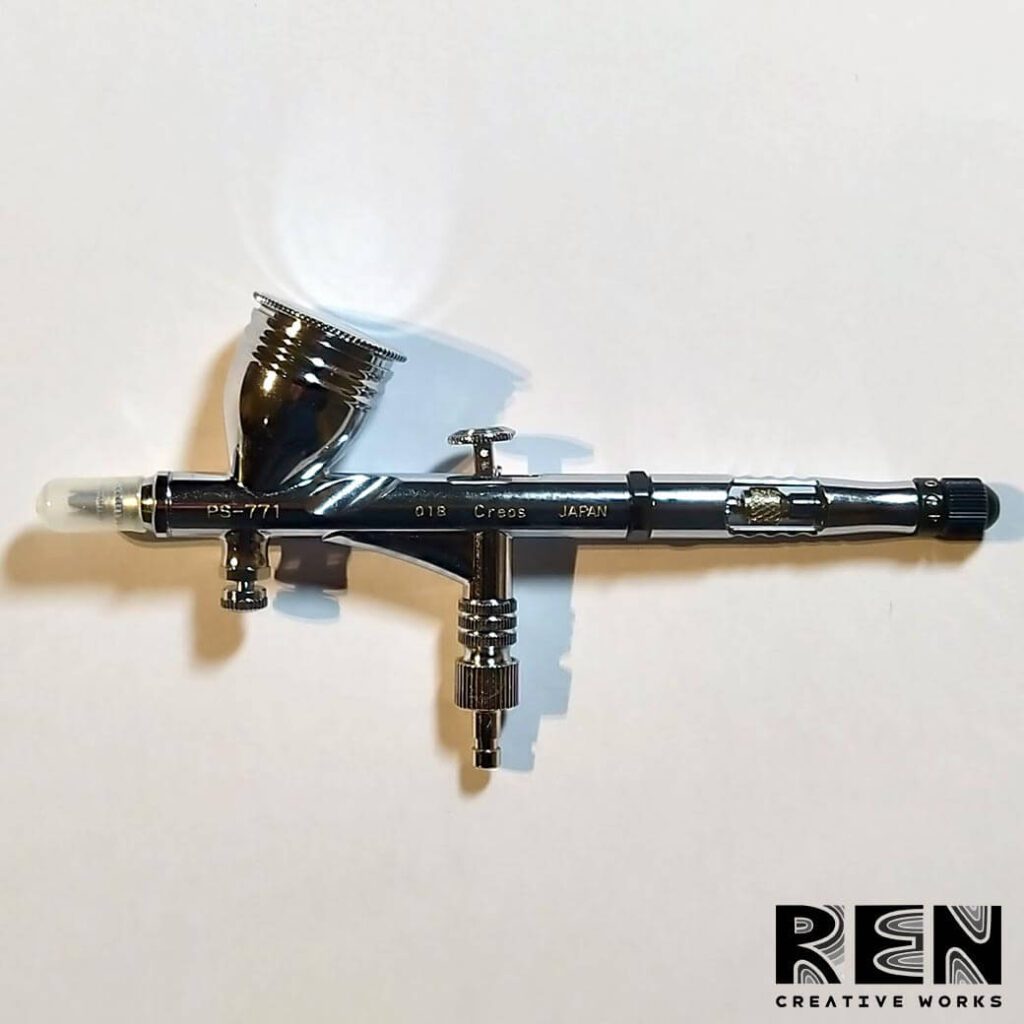
On a single action airbrush, when the screw is twisted, it widens the space between the needle and nozzle by moving the nozzle. In a double action airbrush, when the trigger is pulled back, it moves the needle back as well. The farther back the needle moves, the larger the space between the needle and nozzle.
If you need to apply highly controlled amounts of paint or ink, then a double action airbrush is best. However, if you are just starting out using an airbrush, a single-action will suffice at first.
Gravity Feed
A Gravity Feed airbrush uses gravity to pull the paint from the cup/container down toward the airbrush’s tip to be sprayed. A gravity feed airbrush generally uses very little paint, and can even spray with only a single drop of paint in the cup.
Because it does not pull paint from a bottle, it is possible to spray with less air pressure. The paint is more thoroughly atomized, and within reason, are also more forgiving with paint mixing mistakes. I really recommend this type of airbrush for all beginners.
Side Feed
Preferred by many professional airbrush artists, as it provides a clear line of sight when doing fine detail work. Additionally, it gives more room for the trigger finger to extend as the paint cup does not obstruct, and will even spray upside down.
Side feed airbrushes can use different sized paint cups and bottles, making them quite versatile. For beginners, I do not recommend a side feed airbrush. There are a lot of attachments, and it is easy to lose focus on learning to airbrush.
Siphon/Bottom Feed
The Siphon/Bottom feed airbrush uses a bottle or paint container reservoir which is located on the bottom of the airbrush. Paint is drawn up into the airbrush through a small tube. Different sized bottles can be attached which allows you to spray more of your chosen medium, similar to spray gun.
The biggest advantage with this design is you can quickly change bottles, which makes them ideal for spraying several different colours. However, you do need to maintain a minimum level of paint in the bottle for the paint to be drawn up.
Nozzle Size
The nozzle is the most important piece on any airbrush. It’s also the most fragile. It separates the fast moving air from the liquid until the moment it’s atomized into an aerosol spray.
Most Airbrush manufactures use a metric measurement in millimetres, the smaller the number the finer the tip.
Painting Fine Details
Smaller nozzles range in size from 0.10 mm and 0.5 mm. There are some fine nozzles that are very expensive to replace. So it is important to keep the nozzle covered by a cap and protect it from damage.
Painting Large Areas
Using bigger nozzles, which range from 0.6 mm to 1.5 mm, you can use thinner to thicker viscosity or pearlized spray materials. Such as I have in this painting below:
How to Choose the Right Air Source
The last product in this list is a bit different because it teaches beginners to get better with an airbrush device or technique. If you invest effort on finding a suitable air source, it will help you achieve consistency in you work.
Ideally, any unit that is capable of generating at least 30 pounds per square inch (PSI) will be suitable.
If you will be fine spraying, your ideal pressure is anywhere from 10 to 20 PSI. However, this can depend on so many factors such as the airbrush, paint and the level of coverage or detail required.
Airbrush Propellant Can
The airbrush propellant can is a gas can used to propel the Airbrush when spraying products
Airbrush Propellant is an ideal air source for short or intermittent usage with all types of airbrushes. My tip is to always keep a spare to never run out halfway through a job.
From a financial point of view, the bottles are quite expensive and will quickly empty. The purchase of a compressor will pay itself off here after painting your third model.
CO2 Tanks
I do not recommend the use of CO2 cylinders as an option for the operation of an airbrush gun. It can be very dangerous if the right safety precautions are not followed.
Carbon dioxide displaces oxygen in the lungs and is heavier than air. So it collects near the ground and is a real danger for children, pets and the artist. Ventilation of the workshop is of limited help here!
Airbrush Compressor
In my opinion, if you have decided airbrushing is for you, and you are sick of using propellant cans, get yourself a proper compressor. I’ve had my compressor for a couple of years now, and it has paid for itself many times over in saved frustration.
The piston compressor is the most common choice for delivering air to an airbrush. It is usually more powerful than a diaphragm compressor and produces a higher volume of air. Piston compressors operate at relatively low noise levels, however, this can vary depending upon the size of the compressor.
Pressure Regulator
Make sure the air compressor you purchase has a pressure regulator. A pressure regulator is a device that controls the pressure of a gas or liquid as it flows from one point to another, in this case compressed air.
It is used to protect downstream equipment, such as a compressor, a pneumatic tool, or an airbrush, from damage caused by excessive pressure.
It is also intended to provide dry, clean, pressure-regulated air when airbrushing. The water separator and water discharge mean there is no condensed water.. Just keep in mind that pressurised air cannot hold as much water as the pressure increases. The water in the air has to go somewhere, so it condenses inside the air compression system.
The working pressure is set by rotating the adjustment wheel, which is located at the top.
The adjustment wheel is protected from accidental setting changes and is released by pulling it upwards. After adjusting the working pressure, the button is pressed again to secure it.
The transparent filter glass, or rather poly-carbonate, allows visual control of the condensed water, which can be released by actuating the valve.
How Much is an Airbrush Compressor?
An airbrush compressor is a must-have for any serious artist or crafts-person looking to create impressive works of art. But how much does an airbrush compressor cost? Knowing the cost of a compressor is essential for ensuring that you get the right one for your needs without breaking the bank.
The price of an airbrush compressor varies depending on its size and quality. Basic compressors typically cost between €50 and €150, while more advanced models can cost several hundred Euros or more.
It is critical to consider the type of compressor you require before purchasing an airbrush compressor. Some are specifically designed for airbrushing, while others may be better suited for other applications, such as industrial scenarios or workshop air tools, so do your homework before purchasing.
Should you wear a Respirator for Airbrushing?
When you are working, it is important to protect your lungs from both the atomised paint and fumes, particularly with solvent based paint. One way to do this is to wear a mask or respirator that covers the nose and mouth. This helps to filter and detoxify the air you breathe.
I airbrush in a well ventilated area with a door open, and tend to use water based paints only. I always cover my face when spraying acrylic varnish.
If spraying indoors at home with water based paint, I would recommend a model spray booth with an extractor fan and filter.
I would never spray solvent based paint indoors at home. Set a space up in your garage or garden shed, wear latex gloves and WHEN SPRAYING SOLVENTS, ALWAYS WEAR A MASK OR RESPIRATOR.
Airbrush Paints
The overall purpose of this article is to let those people who are interested in getting into airbrushing as a hobby obtain more information.
However, how do you go about picking the right paint to use in your airbrush to create artwork?
As I mentioned earlier, you need to ask yourself: What am I going to paint? What do you want to do with your airbrush?
Just like equipment some paint is better than others, and different fluid mediums are suited to different applications.
- Water based
- Inks
- Acrylic
- Enamel
- Solvent Based
Automotive spray paints, colour pigments, thinner, consistency, binders, retarders
Airbrush Painting Techniques
Airbrush painting is a technique that is used to create a wide variety realistic effects. It can be used for both digital and traditional art and are often used in the entertainment industry, such as in movies and video games.
By using an airbrush, you can create smooth, seamless transitions between colours. Some of the techniques beginners should focus on are:
Common Strokes
- Dots
- Lines
- Fade Lines
- Dagger Strokes
Shading
- With or without Stencils
- Drop Shadows
- Stippling
Airbrush Maintenance
It is critical to clean and maintain your airbrush regularly in order to maintain its optimal working condition. Always refer to the manufacturer’s instructions for specific cleaning instructions.
Begin by carefully disassembling the airbrush and removing the needle. After soaking each part in a cleaning solution, gently use a brush to scrub off any paint or debris that has built up. Finally, rinse everything off with water and lightly pat dry the disassembled parts.
I usually apply a drop of oil to the midpoint to the tip of the needle. I then wipe it clean with a folded soft tissue before reassembling my airbrush. Furthermore, if the airbrush trigger is sticking or binding during use, a dab of oil usually helps.
3 Top Tips for Beginners
However, it can be tricky to get started. Here are some tips and tricks to help you get started:
- Practice makes perfect. The more you airbrush, the better you will become at it.
- Choose the right airbrush. There are a variety of airbrushes on the market, so choose one that is best suited for your needs.
- Choose equipment you can afford. You don’t have to get the best of the best if you are just starting out, as you can always upgrade later. Consider buying second hand, or see if you can get a shop demonstration or a returned/refurbished model.
As with everything, you get what you pay for, cheaper is not necessarily better, but there are quality affordable options available.
Conclusion: The Key to Airbrush Success is Practice!
I hope you enjoyed this blog about airbrushing for beginners. Airbrushing is one of those art techniques that requires a lot of practice to master. It allows for a greater range of blending colours and more freedom than many other types of art. I am still learning and trying to perfect the technique, but it is well worth the effort when you see what the tool is capable of.
There are lots of excellent airbrushing tutorials available online by some amazing airbrush artists only too happy to share their skills and knowledge. I hope you decide to give it a try! If you have any questions, please don’t hesitate to reach out to me.
If you enjoyed this article, please show your support by subscribing to my mailing list and sharing it with your network! As an independent artist, your support means the world to me. Your time is valuable, and I appreciate you taking the time to read my blog.
Don’t miss out on future articles and updates – subscribe now and stay connected!
Between Twelve 12 and Fourteen 14
This Original and Unique Acrylic Painting will bestowal nothing but good luck on you!
airbrushed
Adrian Reynolds, ‘Ren’, is a contemporary artist based in Dublin, Ireland. His paintings are a response to the world around us. A world that changes faster than ever before. His work explores colour, form, and texture, placing it at the intersection of abstraction and representation. His work has been featured in Ireland, the UK, and the US.
Latest Artwork
-
Bullets Travel Distance & Time
Abstract Art Paintings €1,000.00Add to basketBullets Travel Distance & Time | Acrylic Painting By Adrian Reynolds
-
The Perception of Narrative
Abstract Art Paintings €800.00Add to basketThe Perception of Narrative | Fine Art Acrylic Painting By Adrian Reynolds
-
Iridescent Dream
Abstract Art Paintings €240.00Add to basketIridescent Dream | Acrylic Painting By Adrian Reynolds
-
Blue Nebula
Abstract Art Paintings €240.00Add to basketBlue Nebula | Acrylic Painting By Adrian Reynolds
